Build a React-Redux Shopping List App
If you don’t know what Redux is, then go read this before starting so that you have an understanding of the fundamentals.
The Problem
We’re needing to build an application that allows users to keep track of their shopping list. Let’s call it ShopDrop. ShopDrop needs to meet certain criteria:
- Users need to be able to add an item to their shopping list
- Users need to be able to mark an item as in their basket
- Users need to be able to remove an item from their shopping list
- Users need to be able to clear the entire shopping list
That’s the basic functionality of what a shopping list is. Now let’s look at how we meet these criteria by using Redux to manage our state.
The Product
Let’s have a text input where users can input the shopping item. They can then click the Add button to add that item to their list. They can click the Clear button to remove all items from the list. If the user taps an item, it’ll mark that item as in their basket and the colour will change to grey. If they tap the item again, it’ll remove that single item from the list.
Actions
Inside the src folder of our project, create another folder called store. We’ll create two files in here – actions.js and reducer.js. Go ahead and create the first so long.

This is how our action creators must look. We’re following the FSA model that we discussed in the previous blog post. We need four (one for each manipulation of the store we need to perform). Notice how the first 3 all take in a payload. That’s because they’ll need to take in something like the value of the shopping item text or an id of the item to either mark it as in the basket or remove it from the list. The reason clearItems doesn’t need any data is because all we’ll need to do there is set the array in our store back to an empty array. Therefore, we don’t need to pass any data through.
Add Item
Now go ahead and create reducer.js file inside of our store folder. Then let’s set up our initial state which should look something like this:

Now let’s create our reducer and the first action we’d need to handle which is adding a new item to the item array in our store.
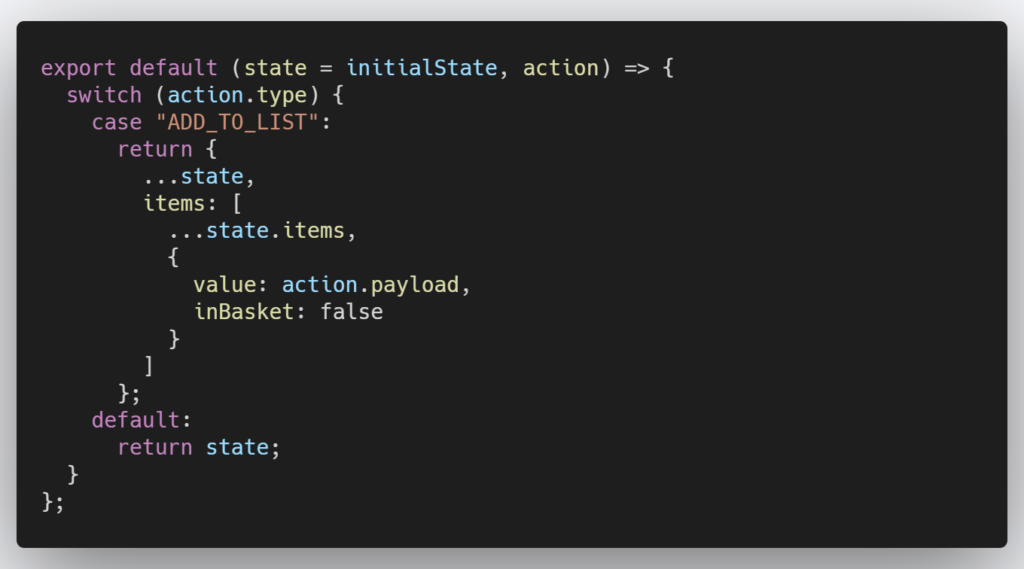
Since we’re only going to export our reducer function from this file, we can use the keywords export default and not have to provide a function name. Our reducer function then takes in the initialState and the current action that’s been sent to the store.
Before we dispatch any actions to the store, the value of our store would just be the empty items array. Then as actions start coming in, that value will change to reflect those changes. Don’t get confused and think that we’re resetting state to the value of initialState each time an action comes into our reducer.
Our ADD_TO_LIST case might look a little confusing if you’re new to Redux and immutable update patterns in JavaScript, however, it’s fairly simple what’s actually going on. When the action.type is of the value ADD_TO_LIST, we’ll make use of the spread operator to return the current value of the state and then append a new item to the current state.items array.
This is how we immutably update the state. A summary is that we take the current state value, make our changes immutably and then return that entirely new object which is the set as the new state value.
Clear Items
You may already have an idea on how to handle the functionality for clearing the items:

Here we’ve added another case to our reducer and all it has to do is return the new state object with items as an empty array. That’s it.
Add Item To Basket
Note: For demonstration purposes, I’m going to be making use of an the index to match our item with the same item in the array. I wouldn’t normally condone using indices instead of a unique identifier but for simplicity’s sake, let’s go with the index.
We’ve looked at adding an item to the array and then clearing the whole array. Now is where we properly need to think about immutable update patterns. Adding an item to our basket means that we need to reassign the inBasket propety on that item to true.
If you go read the Redux guide to immutable update patterns, you’ll see that they mention using a function to handle updating an item in an array that looks like this:
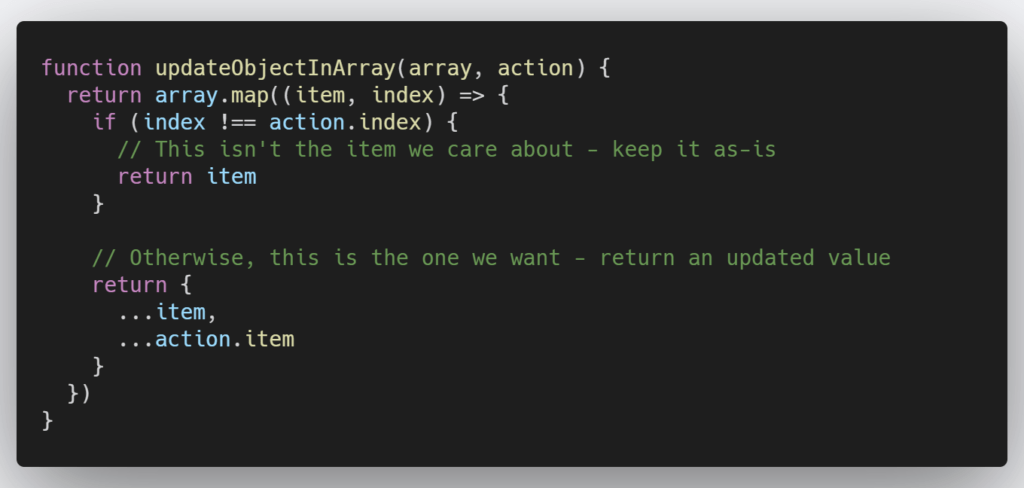
Let’s follow how the guides tell us to do things (at least in this instance). Add the above function to your reducer.js file but outside of our reducer, however, let’s make a slight change so that we’re properly updating the inBasket to true. We’ll do this in the last return object since that means the indices matched.

This function is only going to be used by our reducer so we don’t have to export it.
Our case for marking an item as in our basket would then look like this:

We call the updateObjectInArray function and provide it with our items array along with the current action that our reducer is making sense of. The updateObjectInArray function will then return to us the updated items array.
Remove An Item From The List
Again, we can reference the immutable update patterns documentation to see how they suggest remove an item from an array.
The show a couple variations but this is the simplest:

Once again, let’s add that function as a private function to our reducer.js file.
Our REMOVE_ITEM case will then look a little something like this:

Just like our previous case, we’re calling off to a function which we provide an array (our items) and the current action. What’s returned to use is a new items array with the relevant changes having been made.
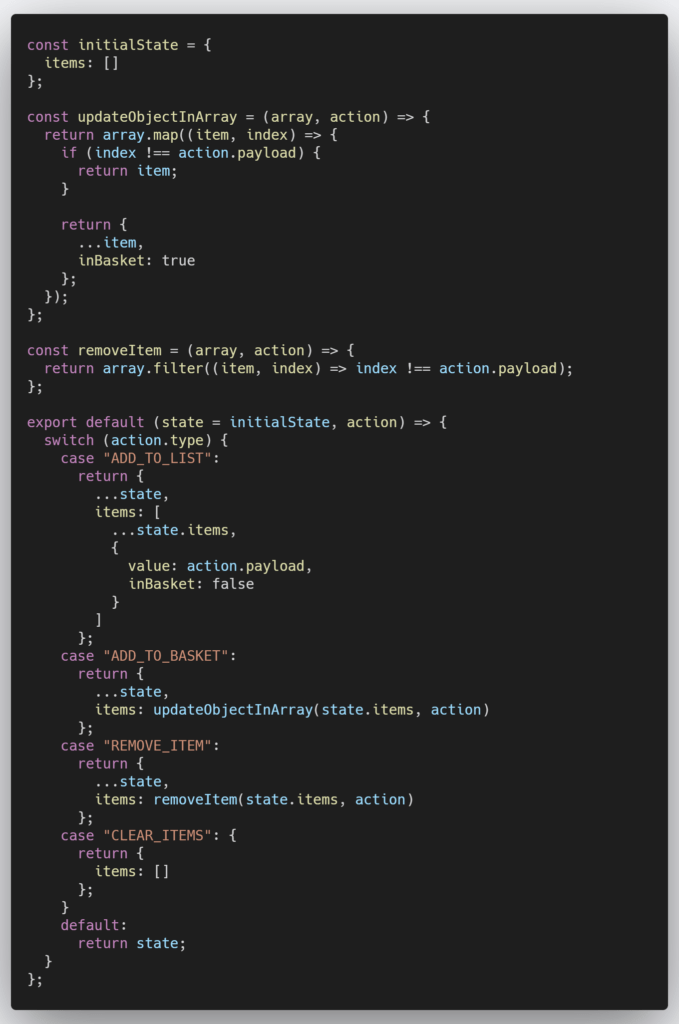
Our entire reducer.js file should look something like this:
Add Item Component
Now is the part where we would actually need to build our component that is going to dispatch our actions. For adding an item, all you’ll need is an input that keeps track of the value and a button that when clicked, will dispatch an addToList action with the current value of the input. Let’s save time and implement the clearing items functionality here too.
Using hooks and the react-redux library, you can import dispatch and then just wrap any of your action creators method in dispatch. Your component could end up looking something like this:
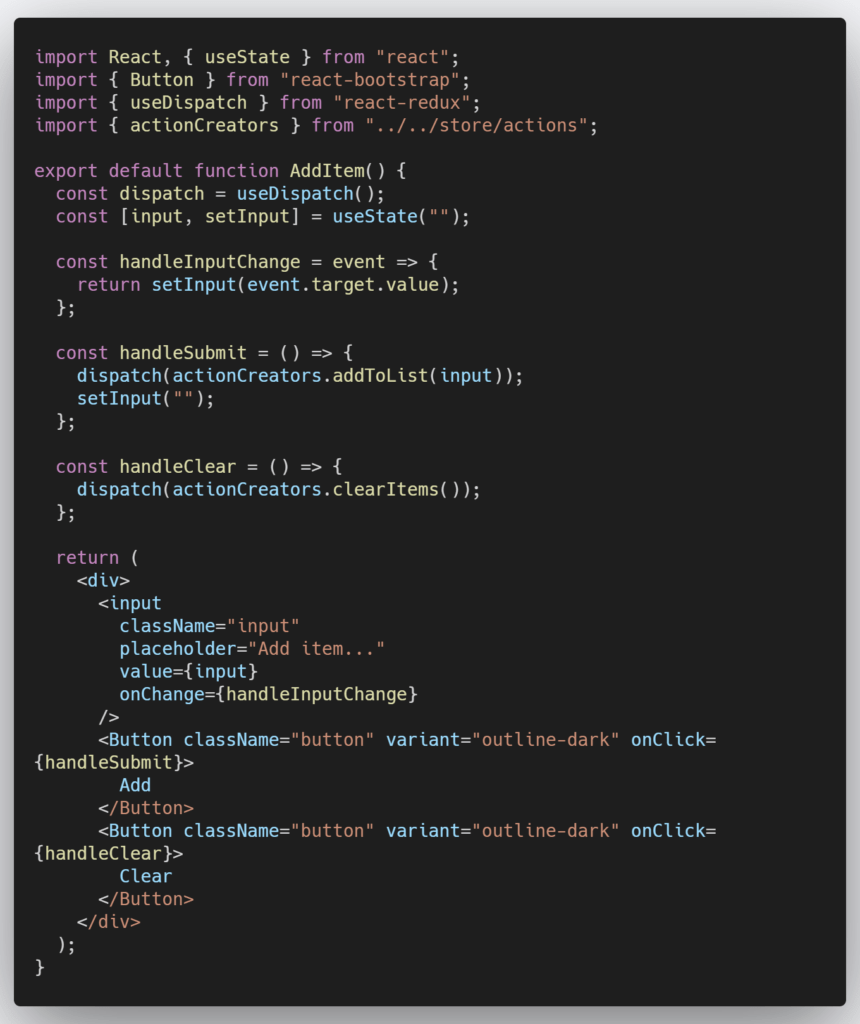
We’ve setup the input and make use of the useState hook to track and clear that value. The handleInputChange simply updates that value on each JavaScript event that is emitted with each key press. We then have two buttons for our two operations. Each button has a handler method that just dispatches the relevant action (which we import from our /store/actions file).
Viewing The Shopping List
Now let’s build a componentt to display our current list of items as well as provide us with an interface in which to mark the items as either in our basket or removed.
Again we’ll import our action creators as well as useDispatch from the react-redux library but we’ll also import useSelector from the same library. useSelector is a selector hook that allows us to get values out of the store.
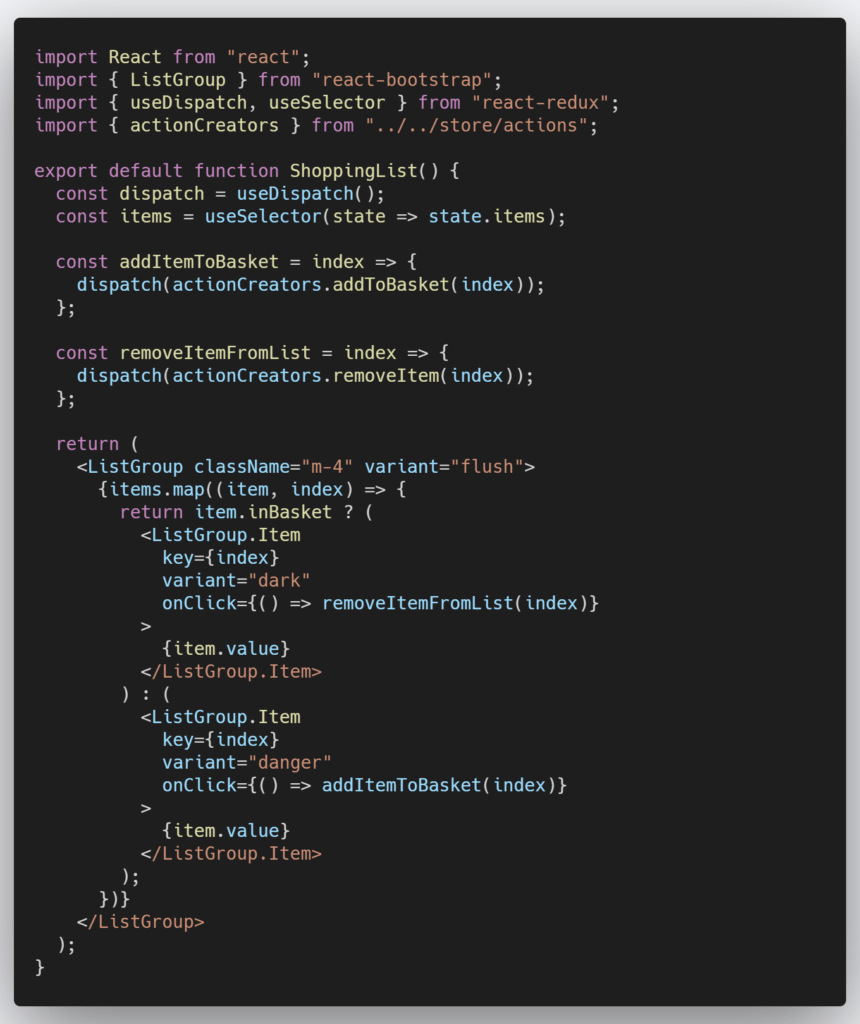
You’ll notice that when we are mapping over the items, we’re either rendering an item that is dark (grey) and calls off to removeItemFromList when clicked or we’re rendering an item that is danger (red) that calls off to addItemToBasket. Ideally I’d have created two different components and move them into their own file but for demonstration purposes it made more sense to keep them unabstracted.
Both addItemToBasket and removeItemFromList both take in the index of the selected item and simply dispatch that as data along with their relevant action.
Lastly, The Setup
Now that we have everything we need (action creators, a reducer to handle our actions and components to dispatch actions), we need to setup our store so that our application can make use of Redux. You’ll need to locate our index.js file and make some simple changes there.
You’ll need to import createStore from the redux library as well as Provider from the react-redux library. We’ll use createStore to generate a store from the reducer we created. Your index should look something like this:
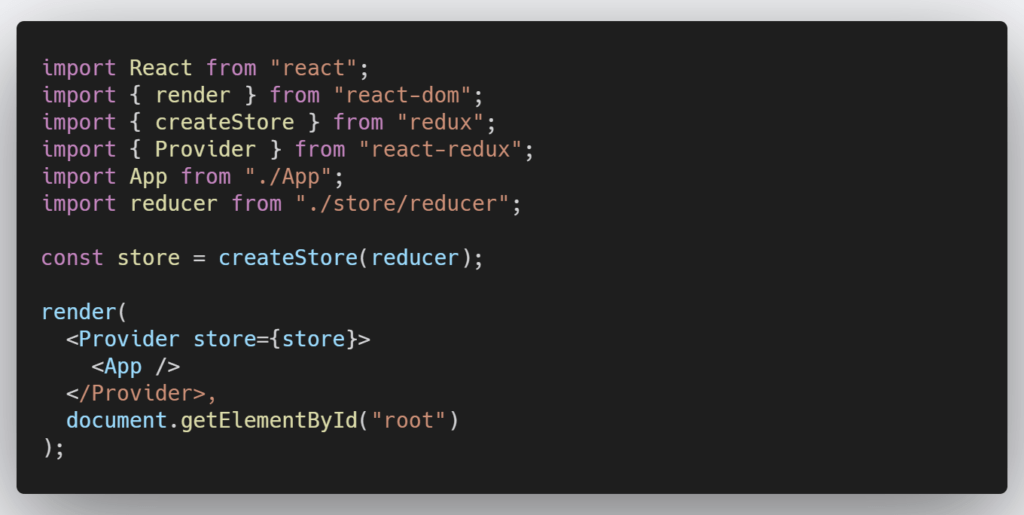
Now our application will be able to make use of Redux because Provider makes the store available to any nested components.
You should have everything you need to get this application up and running. If there is anything that is unclear, check out my CodeSandBox which will provide you full access to repo so that you can see the entire solution or just mess around.